DIY Paper Flower Tutorial: How to Make Stunning Origami Roses
Looking for a fun and creative craft project? Why not try making some stunning origami roses out of paper! These beautiful flowers make great decorations or gifts, and they're surprisingly easy to make with just a few simple steps.
Materials:
- Colored cardstock
- Scissors
- Glue stick
- Ruler
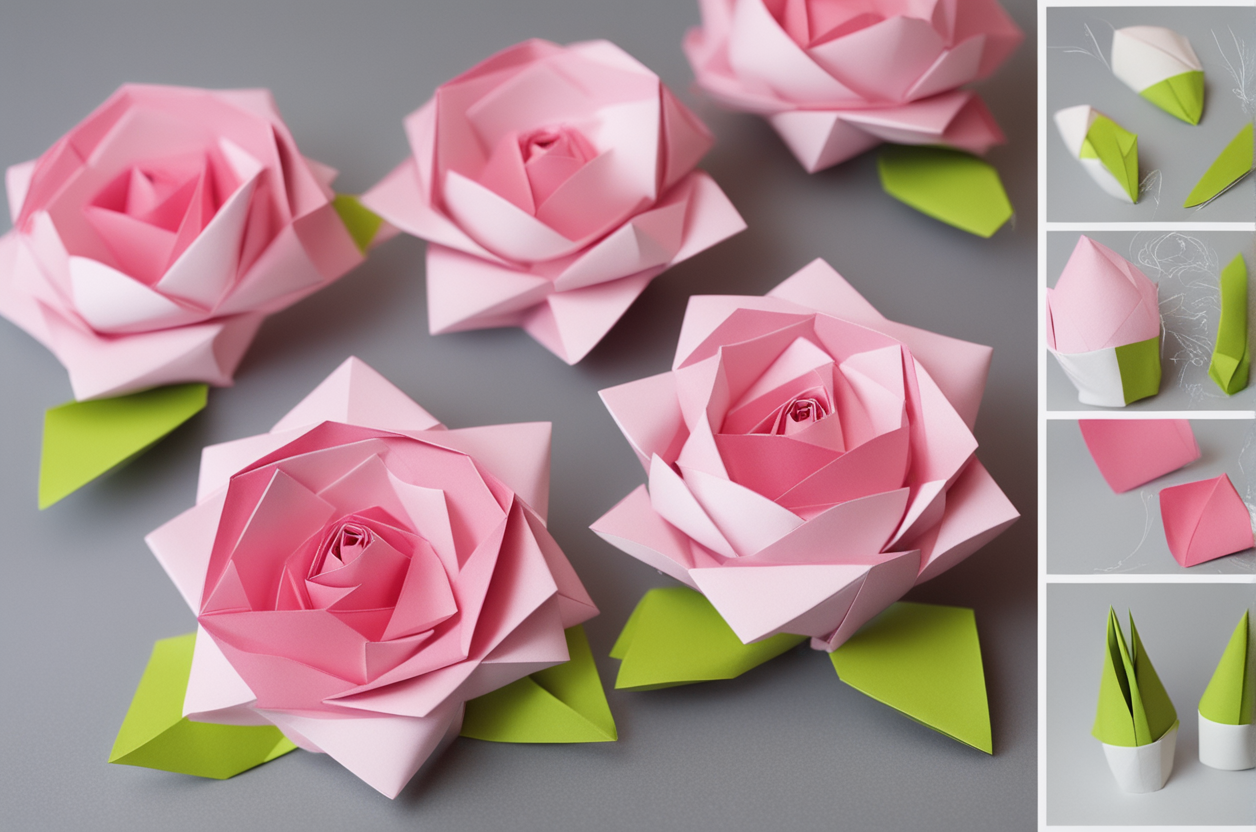
Instructions:
- Cut a square piece of colored cardstock into a 6x6 inch square.
- Fold the square diagonally in half to form a triangle.
- Fold the left side of the triangle up so that it aligns with the right edge of the triangle.
- Repeat step 3 on the other side of the triangle.
- Unfold the triangle and repeat steps 3 and 4 again.
- Fold the bottom point of the triangle up to meet the top point of the triangle, forming a smaller triangle.
- Repeat step 6 on the other side of the triangle.
- Unfold the triangle and repeat steps 6 and 7 again.
- Fold the bottom point of the triangle up to meet the top point of the triangle, forming a smaller triangle.
- Repeat step 9 on the other side of the triangle.
- Unfold the triangle and repeat steps 9 and 10 again.
- Repeat steps 3-11 until you have made 5 petals.
- Using a glue stick, attach the petals together at their bases to form a rose shape.
- Trim any excess paper from the base of the rose to create a clean look.
- Attach a green stem to the base of the rose using hot glue or tape.
- Display your finished origami rose proudly!
Tips:
- Experiment with different colors and patterns of cardstock to create unique roses.
- Use floral wire instead of a green stem for a more realistic look.
- Make multiple roses and arrange them in a vase for a pretty centerpiece.
- These roses also make great gift toppers or party decor!
Keywords:
- origami
- paper crafts
- diy projects
- flower arranging
- crafts for kids
- party decorations


Comments
Post a Comment